> For the complete documentation index, see [llms.txt](https://docs.lan.kokomocloud.com/llms.txt). Markdown versions of documentation pages are available by appending `.md` to page URLs; this page is available as [Markdown](https://docs.lan.kokomocloud.com/configuring-networks/configuring-access-points/configuring-ssids/basic-settings.md).
# 基本設定
作成・編集するSSIDの設定を入力します。
## 新規作成
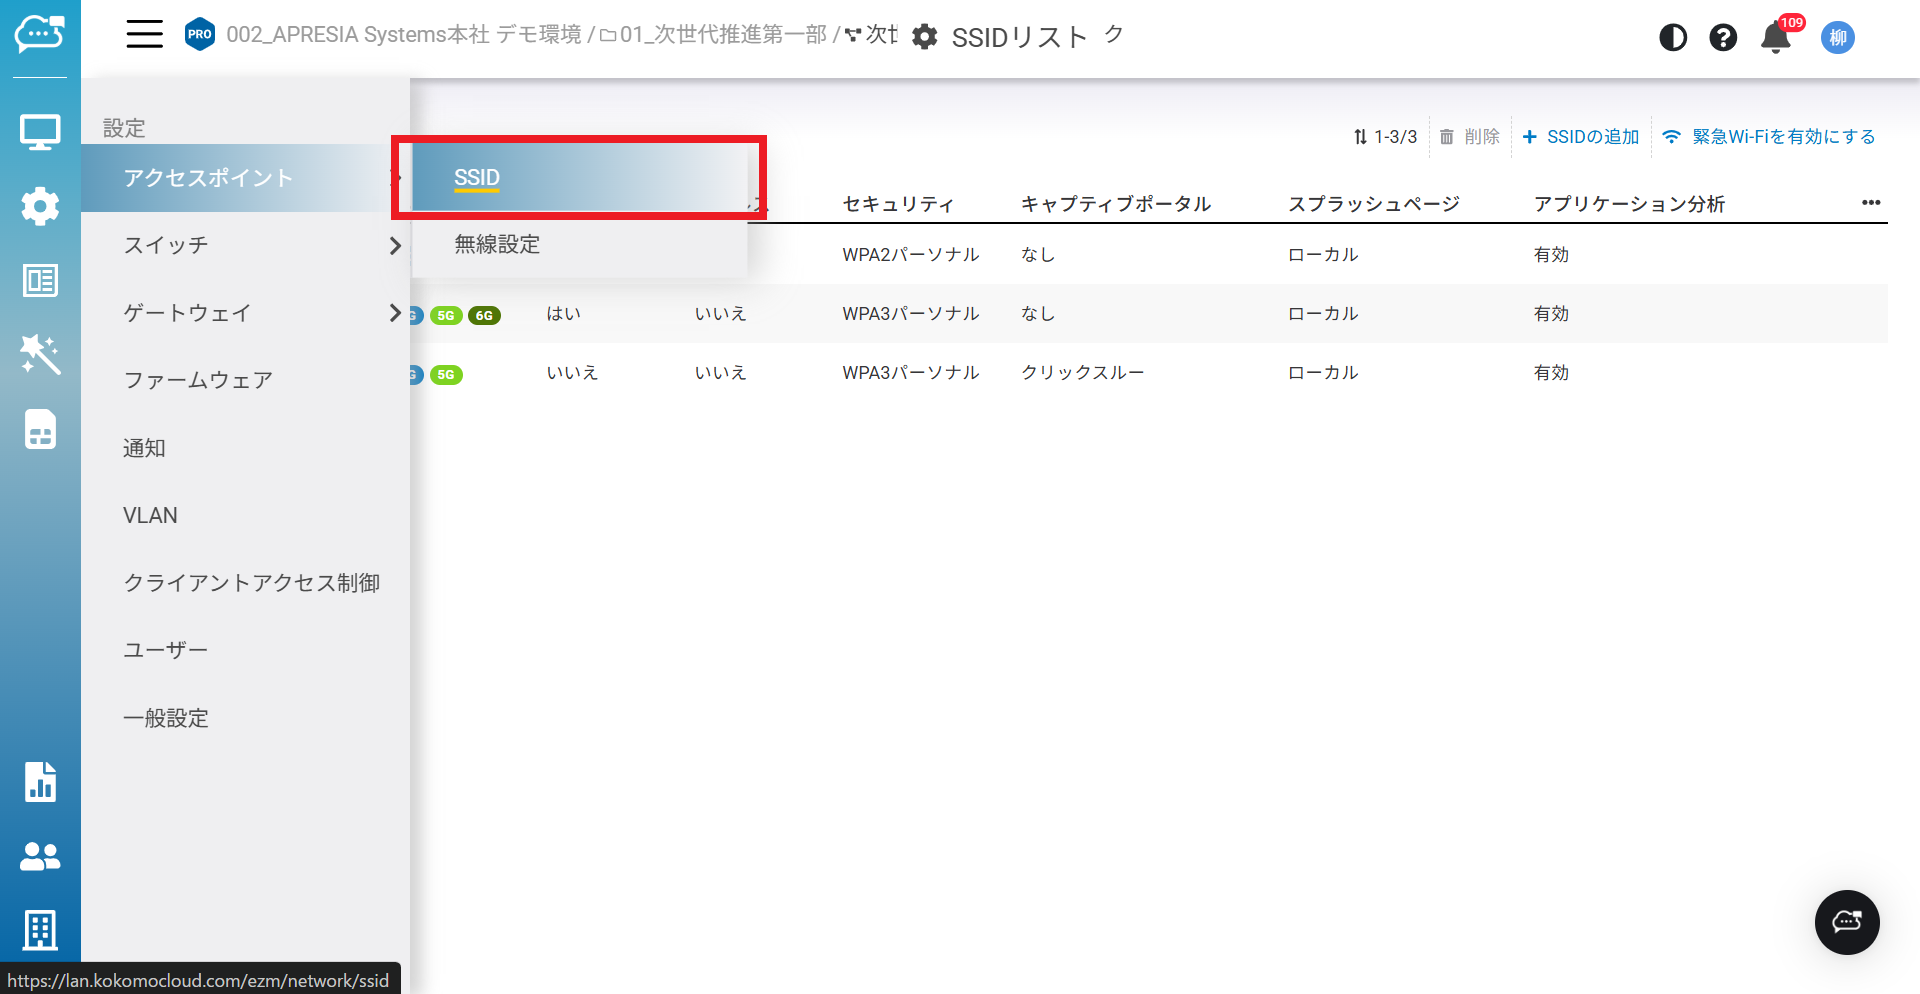
新規にSSIDを作成する場合は、「**設定**」>「**アクセスポイント**」>「**SSID**」を選択し、表示される画面右上の「**SSIDの追加**」をクリックします。
「設定」>「アクセスポイント」>「SSID」選択
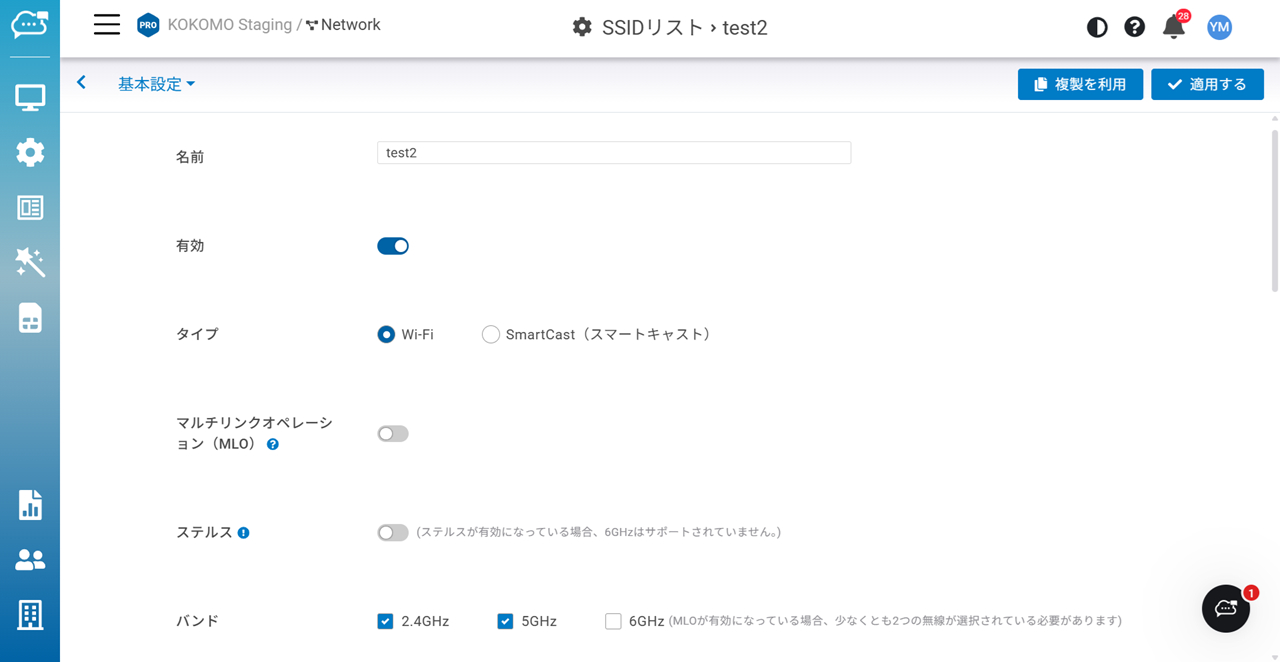
表示される画面にしたがい、必要な情報を入力します。
* **名前:**作成・設定するSSIDの名称です。
* **有効**:当該SSIDの有効・無効を切り替えます。
* **タイプ**:「**Wi-Fi**」のみサポートです。
* **マルチリンクオペレーション(MLO)**:このオプションを有効にすると、Wi-Fi 7クライアントは異なるバンドで複数の非同期リンクを作成し、データを同時に送信して、総帯域幅と安定性を向上させ、レイテンシーを低下させることができます。
* **ステルス**:このオプションを有効にした場合、6GHz無線は無効化され、SSIDがネットワークから隠されます。(現在の6GHz無線ではSSIDを非表示にすることができません。)
* **バンド**:当該SSIDで有効にする周波数帯をチェックします。MLOが有効となっている場合は、少なくとも2つの無線が選択されている必要があります。
{% hint style="danger" %}
SmartCast(スマートキャスト)機能は未サポートです。
{% endhint %}
{% hint style="info" %}
1つのネットワーク内で設定できるSSIDは最大で8つとなります。
{% endhint %}
{% hint style="info" %}
「**基本設定**」以外にも「[**帯域制限**](/configuring-networks/configuring-access-points/configuring-ssids/qos.md)」「[**キャプティブポータル**](/configuring-networks/configuring-access-points/configuring-ssids/captive-portal.md)」「[**スプラッシュページ**](/configuring-networks/configuring-access-points/configuring-ssids/configuring-splash-page.md)」「[**スケジュール**](/configuring-networks/configuring-access-points/configuring-ssids/schedule.md)」「[**アクセス制御**](/configuring-networks/configuring-access-points/configuring-ssids/access-control.md)」「[**ファイアウォール**](/configuring-networks/configuring-access-points/configuring-ssids/layer3-outbound-firewall.md)」「[**アプリケーション制御**](/configuring-networks/configuring-access-points/configuring-ssids/application-control.md)」の設定項目があります。詳細はそれぞれのセクションをご参照ください。
{% endhint %}
## 設定変更
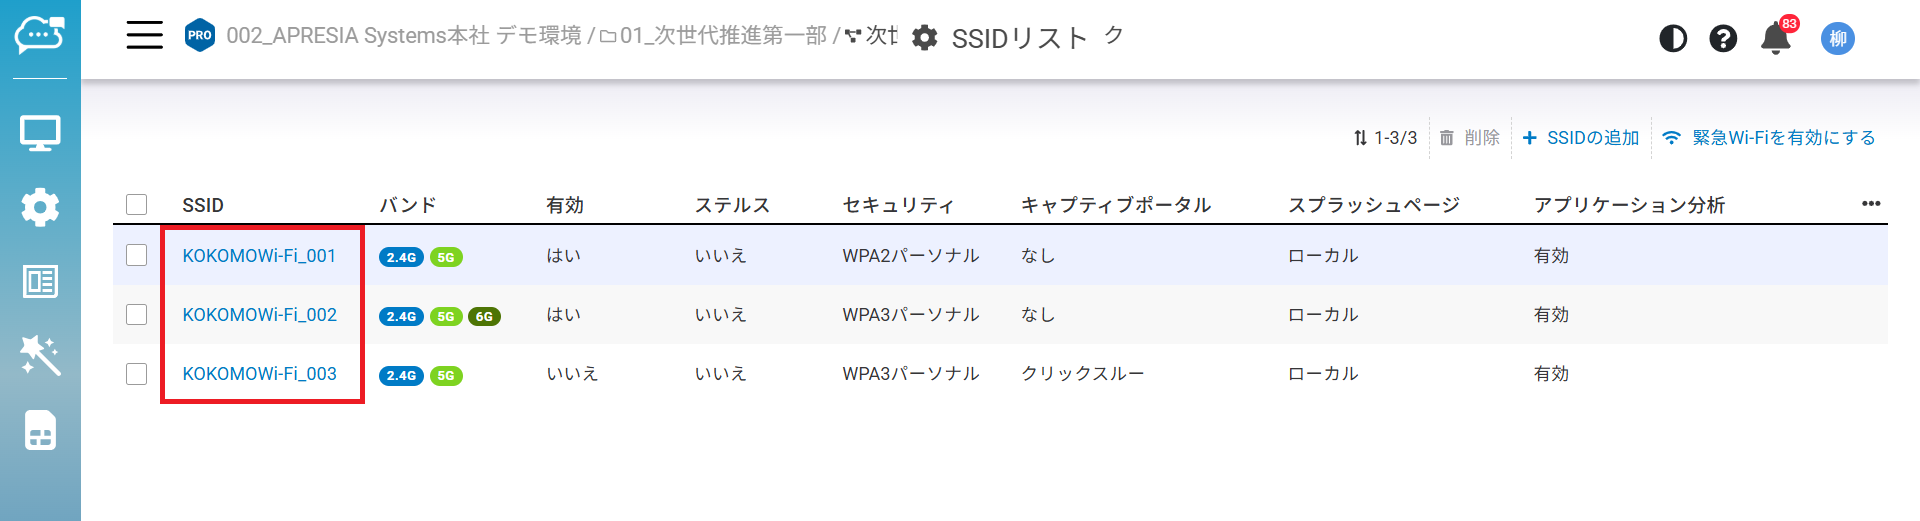
作成済みのSSID設定を変更する場合は、「**設定**」>「**アクセスポイント**」>「**SSID**」で表示されるSSID一覧から当該SSIDをクリックし、設定画面にアクセスします。
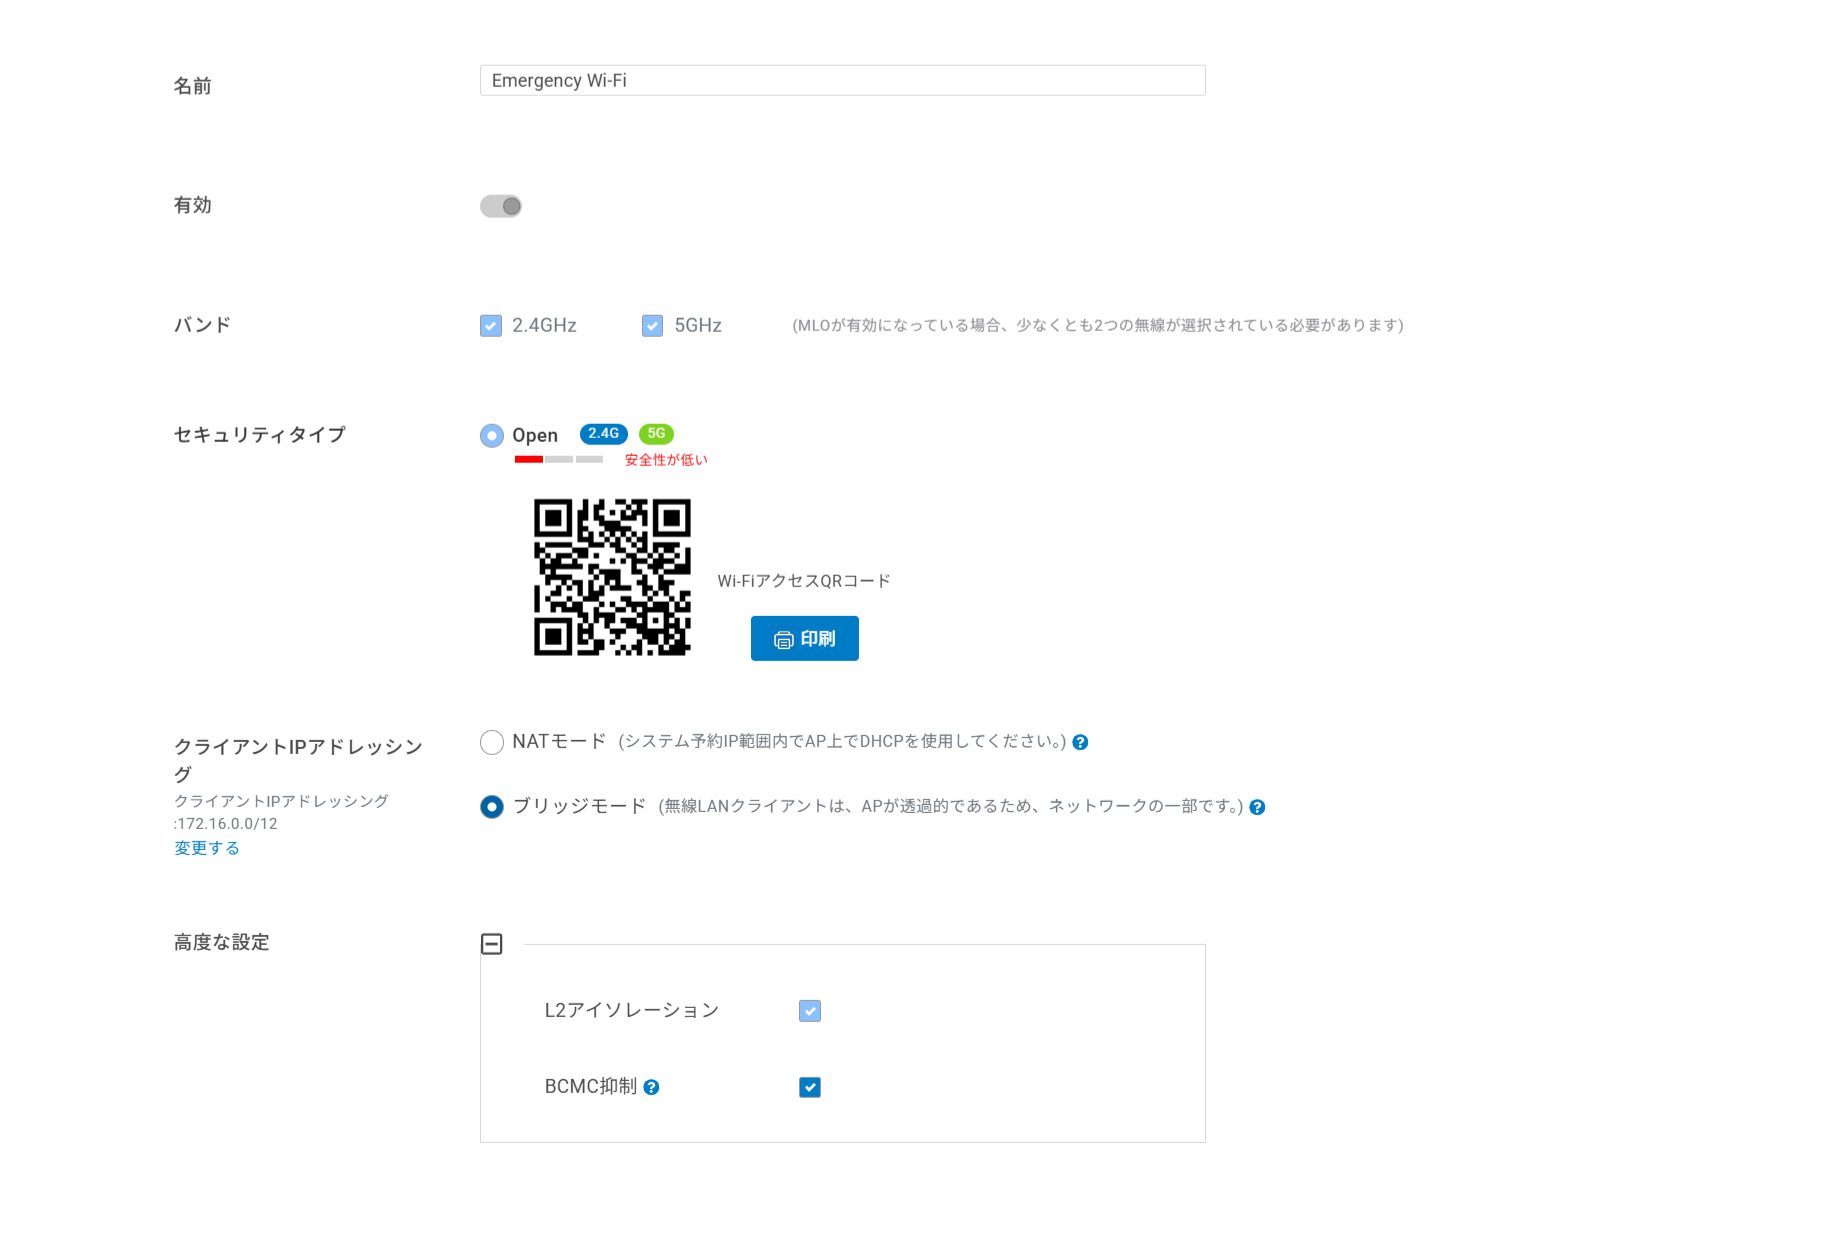
## 緊急Wi-Fiを有効にする
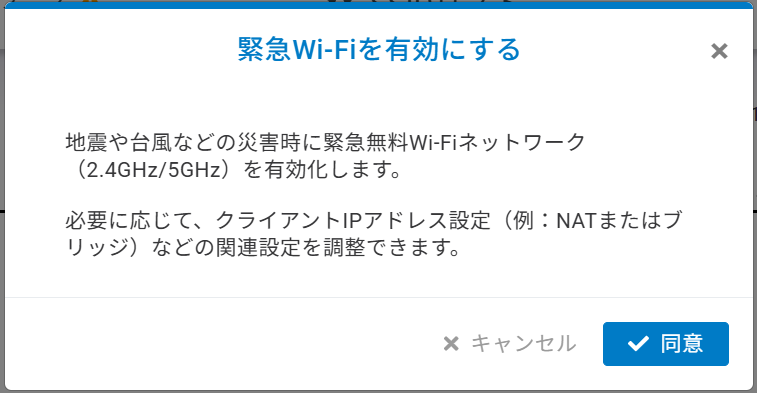
大規模災害や通信障害時に、情報収集や安否確認などを支援するための無料Wi-Fiアクセスとして「緊急Wi-Fi」SSIDを追加する場合、「**緊急Wi-Fiを有効にする**」をクリックします。
深刻な災害等の緊急時に、パスワードやメールアドレス登録などの認証なしで誰でも接続できるようにするため、通信暗号化等セキュリティに関する設定項目はありません。
{% hint style="warning" %}
パスワードや認証などが必要ないため、利用の際にはセキュリティに十分気をつける必要があります。
{% endhint %}
---
# Agent Instructions
This documentation is published with GitBook. GitBook is the documentation platform designed so that both humans and AI agents can read, navigate, and reason over technical content effectively. Learn more at gitbook.com.
## Querying This Documentation
If you need additional information that is not directly available in this page, you can query the documentation dynamically by asking a question.
Perform an HTTP GET request on the current page URL with the `ask` query parameter, and the optional `goal` query parameter:
```
GET https://docs.lan.kokomocloud.com/configuring-networks/configuring-access-points/configuring-ssids/basic-settings.md?ask=&goal=
```
`ask` is the immediate question: it should be specific, self-contained, and written in natural language.
`goal` is optional and describes the broader end goal you are ultimately trying to accomplish on behalf of the user. GitBook uses it to tailor the answer towards what is most useful for that goal.
The response will contain a direct answer to the question and relevant excerpts and sources from the documentation.
Use this mechanism when the answer is not explicitly present in the current page, you need clarification or additional context, or you want to retrieve related documentation sections.