> For the complete documentation index, see [llms.txt](https://docs.lan.kokomocloud.com/llms.txt). Markdown versions of documentation pages are available by appending `.md` to page URLs; this page is available as [Markdown](https://docs.lan.kokomocloud.com/quick-start-guide/hardware-installation/switch-installation.md).
# スイッチの設置
### 横置き設置
本装置を机の上や棚などの水平な面に横置き設置するときは、同梱のゴム足を本体底面に貼り付けてください。
1. 装置に同梱されているゴム足 4個の剥離紙をはがし、本体底面にある丸型のゴム足取り付けマークに合わせて貼り付けます。
{% hint style="danger" %}
ゴム足を使用せずに複数台の重ね置きをしないでください。
{% endhint %}
### ラックマウント
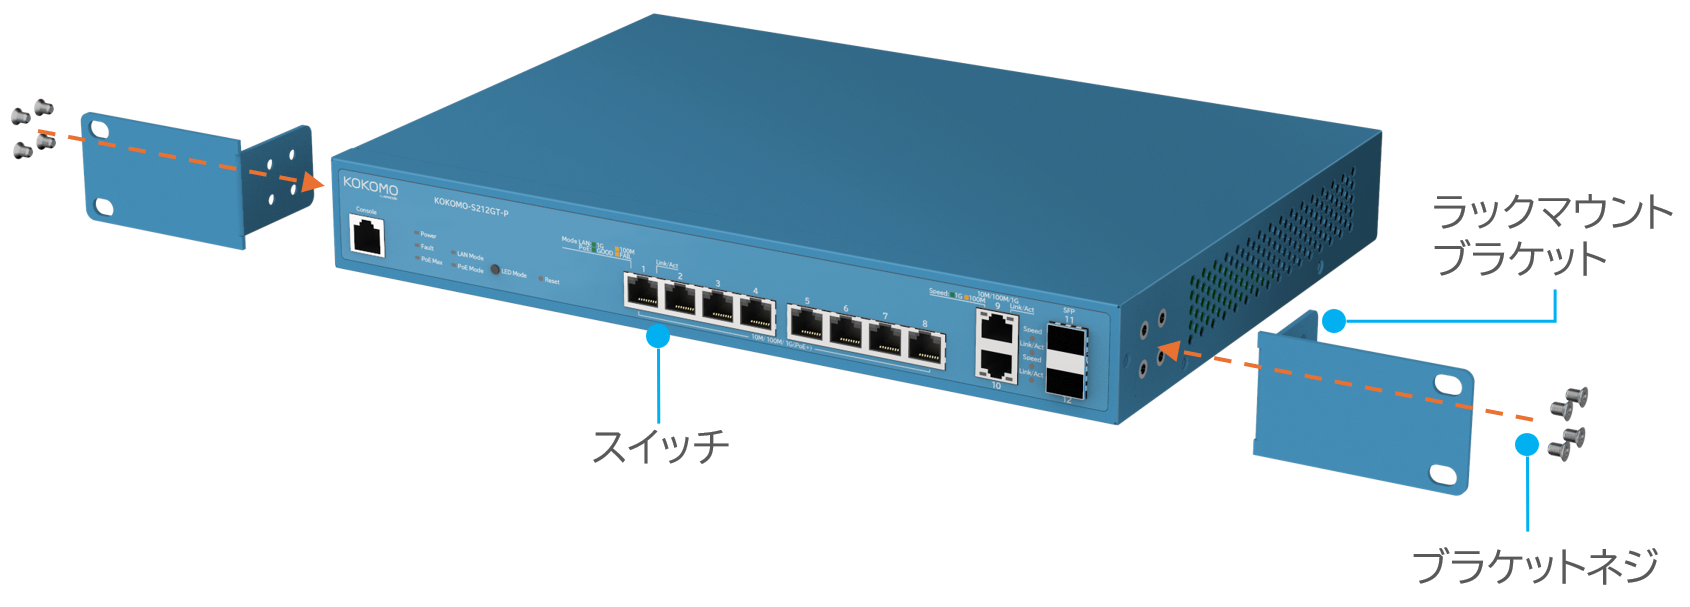
本装置をラックに設置するときは、同梱のラックマウント金具をご使用ください。
1. 以下のように取り付けブラケットを取り付け、8 本のブラケットネジを使用してブラケットを固定します。
*表示される型番はモデルによって異なります。
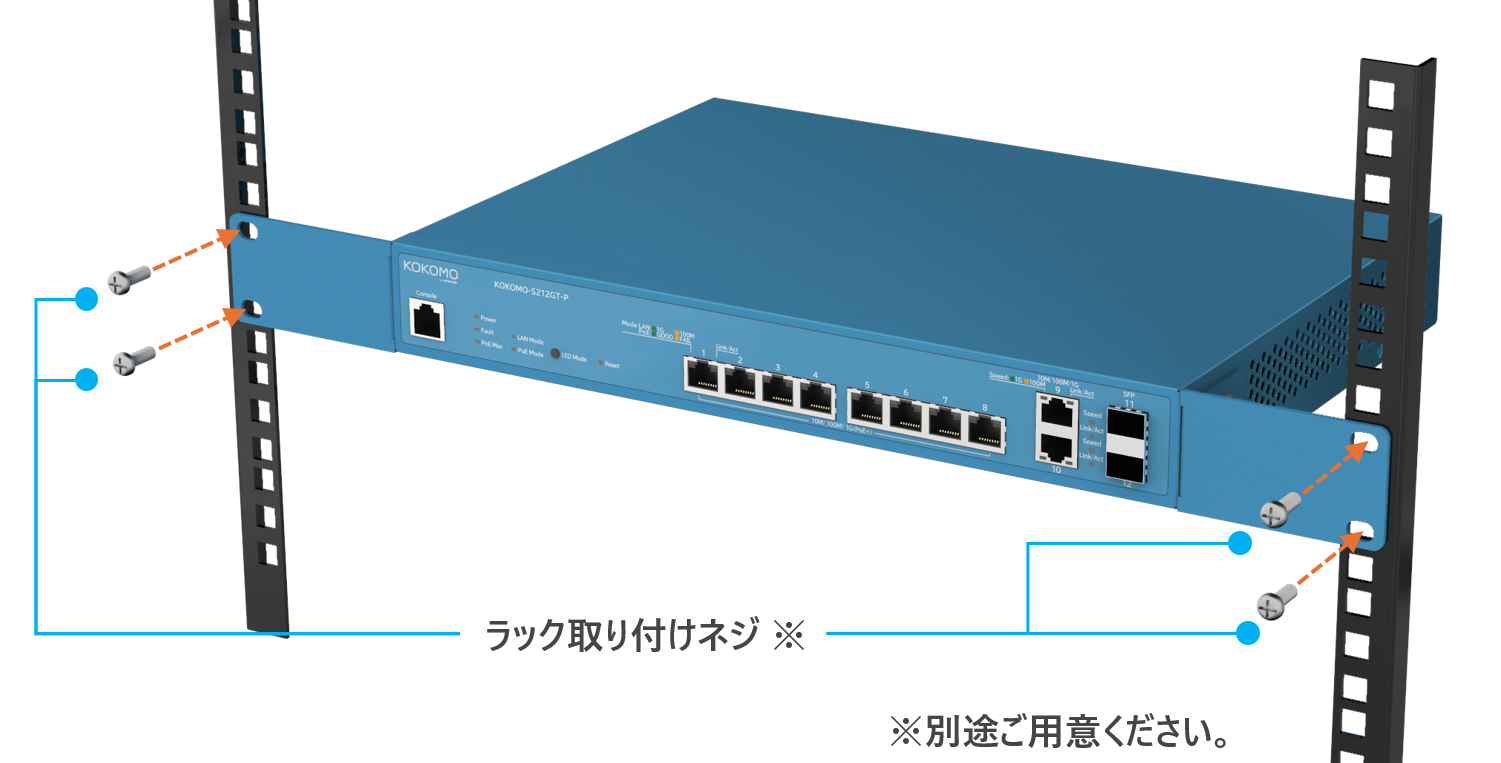
2. マウントブラケットを取り付け用のネジを使用してラックに取り付けます。
*表示される型番はモデルによって異なります。
{% hint style="warning" %}
ラック取り付けネジは付属していません。お客様にて別途ご用意ください。
{% endhint %}
### 装置の電源を入れる
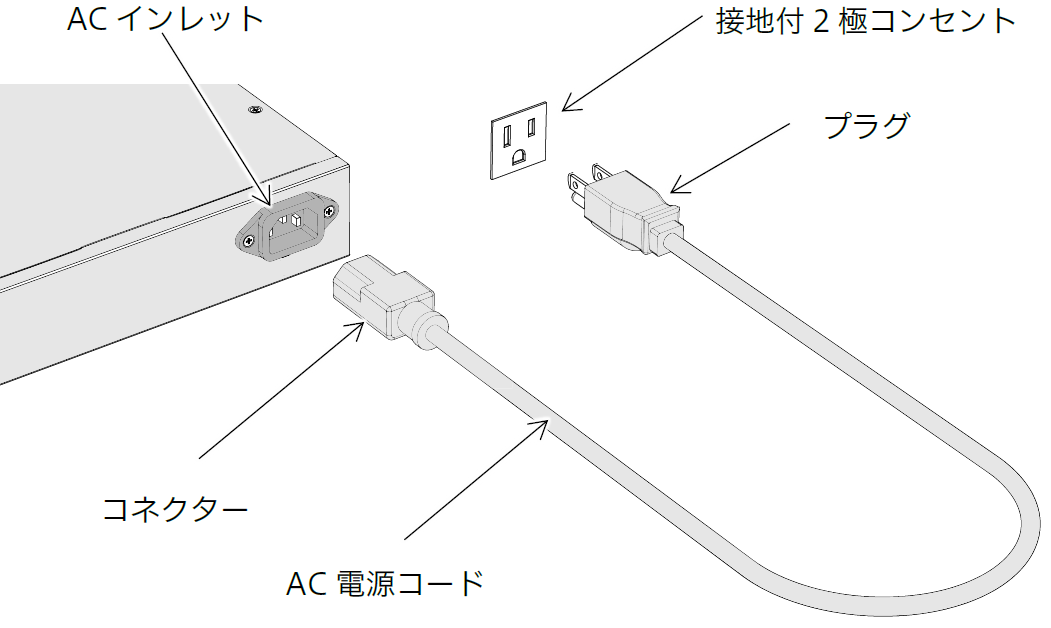
スイッチの背面に電源コードを接続し、その後電源コードを電源コンセントに差し込んでください。
{% hint style="danger" %}
電源コードは、必ず同梱のAC電源コードを使用してください。
{% endhint %}
---
# Agent Instructions
This documentation is published with GitBook. GitBook is the documentation platform designed so that both humans and AI agents can read, navigate, and reason over technical content effectively. Learn more at gitbook.com.
## Querying This Documentation
If you need additional information that is not directly available in this page, you can query the documentation by asking a question.
Perform an HTTP GET request on the following URL with the `ask` and `goal` query parameters:
```
GET https://docs.lan.kokomocloud.com/quick-start-guide/hardware-installation/switch-installation.md?ask=&goal=
```
`ask` is the immediate question: it should be specific, self-contained, and written in natural language.
`goal` is what the user is ultimately trying to achieve, the reason they need the answer. Sharing it helps GitBook give you a better, more relevant answer. A goal is most helpful when it describes the outcome the user wants rather than restating the question. For example, with `ask=how do I create an API token`, a goal like `automate deployments from our CI pipeline` lets GitBook tailor the answer to that use case.
The response will contain a direct answer to the question and relevant excerpts and sources from the documentation.
Use this mechanism when the answer is not explicitly present in the current page, you need clarification or additional context, or you want to retrieve related documentation sections.